Model Driven Apps - Streamline while increasing productivity

Don’t worry, be Appy!
Microsoft have gone a bit App happy the last couple of years, PowerApps, App for Outlook and you can build Model Driven Apps inside D365.
Apps, in terms of D365, allows you to declutter the site map while giving administrators granular control over what is shown to users. You can specify Entities, Dashboards, Views, Business process flows and Charts to either show or not show to users running in a Model Driven App.
Historically, trying to lock the user experience down meant having to edit the sitemap directly and while tools in the XRM tool box helped you with this, it was never really supported by Microsoft and it came with a lot of risks. If you made a mistake and didn’t have a backup of your site map, you could make your CRM instance unusable.
The new App designer allows you to create a bespoke user experience, in a supported way; and what’s more, it can be put into a solution and moved between instances.
I’m going to show you how to create an App in just a few simple steps.
Firstly, open your solution designer and click on Apps in the navigation

Click new App and you will get the Create a New App form. You now get a few base options to choose:
Name
Unique Name (like a schema name)
Description
Icon
Client (web or Unified Interface)
App URL Suffix
Use existing Solution to Create the App
Choose a welcome page for the app

A few things to note about the above options, Client is either the current Web Refresh or the Unified Client Interface, but from the October/Fall release, Unified Client Interface will be the only option when creating Model Driven Apps. Use existing Solution to Create the App will pick up all contents of the solution and will automatically add them to the App, handy if you have a big solution.
Once you have put in this information, press done and the App designer will open. If you have used the Business Rule or Business Process Flow designer, this should be familiar.

On this Screen, at the top, you have the Site Map, just below that Dashboards and Business Process Flows and then the entities.
On the right of the screen you have Artifacts and Entity Assets. You can add an Entity to your App and by default it will add all views, forms, charts and dashboards. When they are added to the Entity View, you can select the Entity Asset and select which components you bring in.
For example, you may have created multiple forms either for testing or other purposes and you can choose to just bring the one form you want users to use going forward, thus decluttering the UI.

You can do the same for views, sometimes you have to create views which might not necessarily be useful to the customer service team, but might be crucial to the Marketing team. If you create a Customer Service App, you can choose to not add in the Marketing views.
Along with adding in the Entities, Dashboards, Views etc; you can also customise the site map. This streamlines the user experience, showing them just the elements of the system the users need to use.

Again, the Sitemap Designer is similar to the App Designer, except this also has drag and drop functionality. From here you can add new Areas, new Groups and new Sub Areas.
Areas - these are the main sections you see in the navigation
Groups - these are the subsets of entities
Sub Area - these are the entities, dashboards, URLs or Web Resources


You can add a new sub area and start building up your site map.

Once you are happy with your Sitemap, save and close the Sitemap Designer. Then in the App Designer, you can save, validate (familiar ay?) and publish the App.
Once published your App will now be viewable in the My Apps section of D365 but not to all users. Instead, only System Administrators and System Customisers will have access to the apps. To give other users access, which is controlled by a security role, you need to go the the My Apps section of D365.

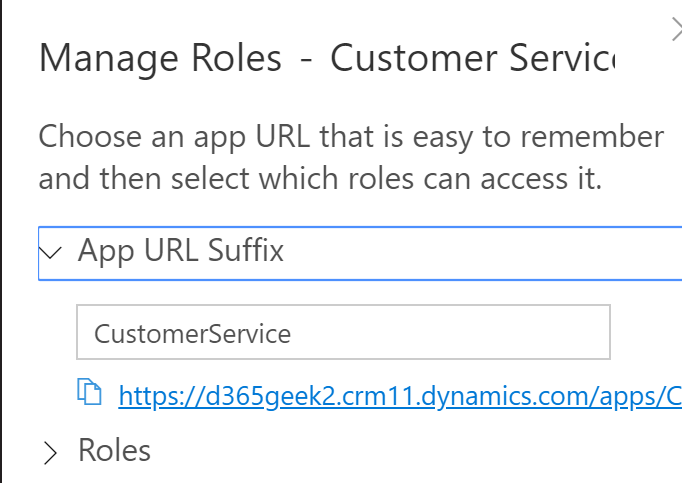
Once there, find your App, click on the 3 dots (ellipsis) and choose Manage Roles. You will get a pop out from the side with two tabs, App URL Suffix, allowing you to change the URL of your App; and Roles, allowing you to give your users access to the App. Select the Roles you wish to give access and press Save.


Your users will now be able to access an “App” specially designed for them with just the bits of the system they need. They can access it via the URL you have specified or via the App selector.
Happy App-ing!
Ciao for now!


